A stunning cake that you want to present to someone special can be a great reason to learn to decorate one. The good news is that you don’t have to start off with a super complicated decorating task! Instead, you can make an easier, much more doable version for your first cake.
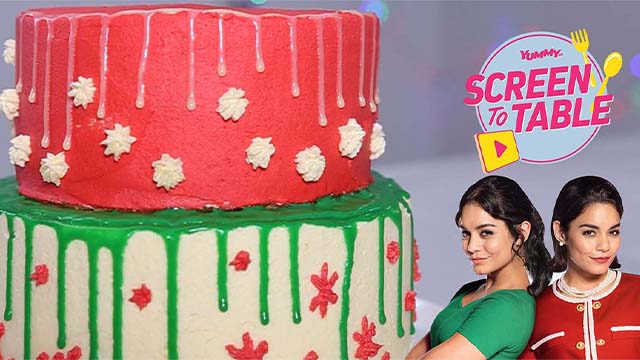
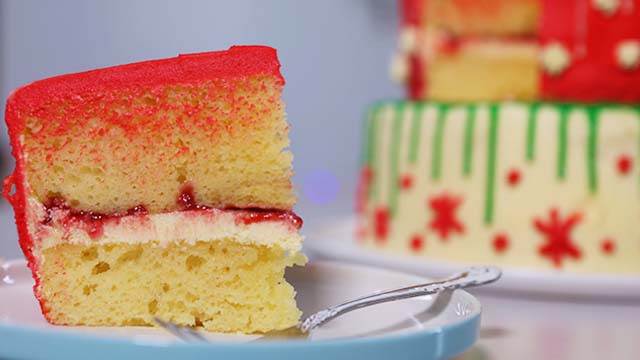
In the Netflix movie The Princess Switch, Stacy De Novo played by Vanessa Hudgens is participating in a baking competition. The cake is a stunning Christmas-themed 6-tiered cake with a castle topper. It’s vanilla cake with raspberry filling and covered in fondant. To make it a homemade version without the stress, you can make a cake using buttercream instead.
The most challenging part of this cake is deciding how to decorate it! We focused on the bottom two layers and as you can see, it’s easy enough to hack at home without any training!
You just need a recipe and an easy guide to help you through the steps to make this cake worthy of a baking competition in Belgravia!
Princess Switch Cake Recipe
- Takes 1 hour 40 minutes
- Makes 10 servings
Princess Switch Cake Ingredients
- 2 8-inch vanilla cake layers
- For the raspberry filling:
- 1 1/2 cups frozen raspberries
- 1/4 cup sugar
- 1 teaspoon lemon juice
- 1 tablespoon water
- 2 teaspoons cornstarch
- For frosting:
- 1 cup unsalted butter, softened
- 4 cups powdered sugar, softened
- 1/4 cup fresh milk
- 2 teaspoons vanilla extract
- Red food coloring, as needed
- For drip ganache:
- 1 180-gram pack white chocolate buttons
- 3/4 cup all-purpose cream
- green gel food coloring, as needed
How To Make Princess Switch Cake
- 1 Make the cake. Use any of these vanilla cakes or even a chocolate cake if that’s what you want:
• Chocolate Cake Recipe With Mayonnaise
- 2 Make the raspberry filling: Combine raspberries, sugar, and lemon juice in a saucepan and bring to a boil. Simmer the raspberries, pressing down on the berries, until the raspberries are broken down and no longer whole.
- 3 Combine the water and cornstarch to make slurry. Pour into the raspberry mixture and simmer until thickened. (Mixture should be thick like jam.) Strain out the seeds through a sieve. Set aside to cool completely.
- 4 To assemble the cake, level the cooled cakes as needed. Place a cake layer on a cake plate or cake stand. Add a layer of the frosting on top and spread to the edges. Create a wall using the frosting at the edge of the cake to create a barrier for the fruit filling. Place some raspberry filling in the center of the cake and spread to the edge of the frosting wall you created. (If desired, pipe frosting in a piping bag fitted with a small round plain tip along the border of the cake instead).
- 5 Top with another cake layer. Cover the entire cake with frosting with a crumb coat. Refrigerate for 1 hour.
- 6 Make the ganache: Heat the white chocolate and cream in a microwave-safe bowl on High for 45 seconds. Stir. Heat again on High for 10 seconds. Stir. If after stirring the chocolate pieces are still not completely melted, heat again in intervals of 10 seconds, stirring after every heating until completely melted. Cover with plastic wrap, pressing the plastic against the ganache to prevent skin from forming. Set aside to cool slightly. (If the ganache has hardened before pouring onto the cake, gently heat in the microwave for 10 seconds and stir until more liquid again.) Stir in food coloring if desired.
- 7 Color the remaining frosting with red food coloring. Coat the cake with a layer of frosting. (Coat it with red frosting if using white ganache.) Decorate the cake with ganache drips starting from the top of the cake. Cover the top with the remaining ganache. Using a star piping tip, decorate the sides of the cake with snowflake/dots using red-tinted frosting. Refrigerate until ready to slice and serve.
Screen To Table is a video series that recreates food, dishes, and recipes from fictional works, whether from books, TV shows, movies, or other pop culture references.
Recommended Videos

***